• Home
  • Video Courses
  • Tools – Cloud Comparison
  • Open Book & References
    • Google Anthos
    • Ethical AI
    • Production Ready Microservices Using Google Cloud
    • AI Chatbots
    • Enterprise IoT
    • Enterprise Blockchain
    • Cognitive IoT
  • Solution Bytes
    • AWS Solutions
    • GCP Solutions
    • Enterprise Architecture
    • Artificial Intelligence
  • About
  • Subscribe
  • Trends
  • Home
  • Video Courses
  • Tools – Cloud Comparison
  • Open Book & References
    • Google Anthos
    • Ethical AI
    • Production Ready Microservices Using Google Cloud
    • AI Chatbots
    • Enterprise IoT
    • Enterprise Blockchain
    • Cognitive IoT
  • Solution Bytes
    • AWS Solutions
    • GCP Solutions
    • Enterprise Architecture
    • Artificial Intelligence
  • About
  • Subscribe
  • Trends

Google Anthos

home/Reference/Google Anthos
Expand All Collapse All
  •  ANTHOS IN A NUTSHELL
    •   Chapter 1: Introducing Anthos
      • Infra, Container and Cluster Management
      • Service Management
      • Anthos Config Management (ACM)
      • ACM Repository configuration
      • Application Development and Deployment
    • Deployment Options with Anthos
    •   Chapter 2 : ANTHOS CLUSTERS ON BARE METAL
      • Anthos clusters on Bare metal Overview
      • Anthos clusters on Bare metal INSTALLATION overview
      •   Deployment Overview
        • Deployment Topology
      •   Installing Anthos Clusters on Bare metal
        • Installation Plan
        • Create VPC
        • Create VMs
        • Install software on workstation machine
        • Setup ssh for passwordless connections between workstation and cluster machines
        • Create VLAN between all the 4 VMs for L2 subnet
        • Execute bmtcl for creating bare metal cluster configuration file
        • Verify the deployment
        • Login and authenticate the cluster using Google Anthos dashboard
      • Deploy a sample application and invoke it via Load Balancer URL
      • Summary
    •   Chapter 3 : Anthos Service Mesh
      • Anthos SERVICE MESH Overview
      •   Anthos Service Mesh Topology
        • Multi cluster service mesh (single VPC network)
        • Multi cluster service mesh (different VPC networks)
      • Implement Multi cluster service mesh in a single VPC network
      • Implement Multi cluster service mesh in a multiple VPC network
      • SUMMARY

Login and authenticate the cluster using Google Anthos dashboard

navveen

Login to Anthos Dashboard and click “view clusters” as shown below 

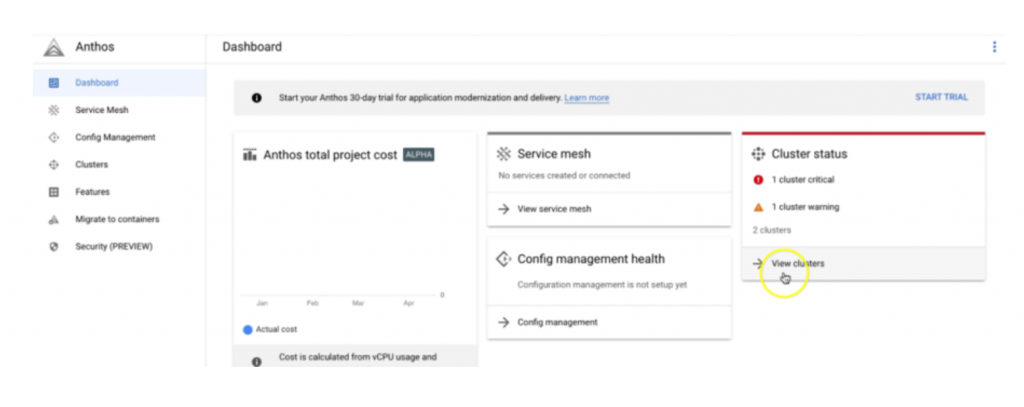
You would see the cluster – “bm-demo-cluster”. This cluster was added to GKE HUB (centralized dashboard ) using GKE connect component.  GKE connect agent is installed on the pods in the bm-demo-cluster during installation, which periodically provides the cluster status and listens to required activity feeds from GKE HUB.


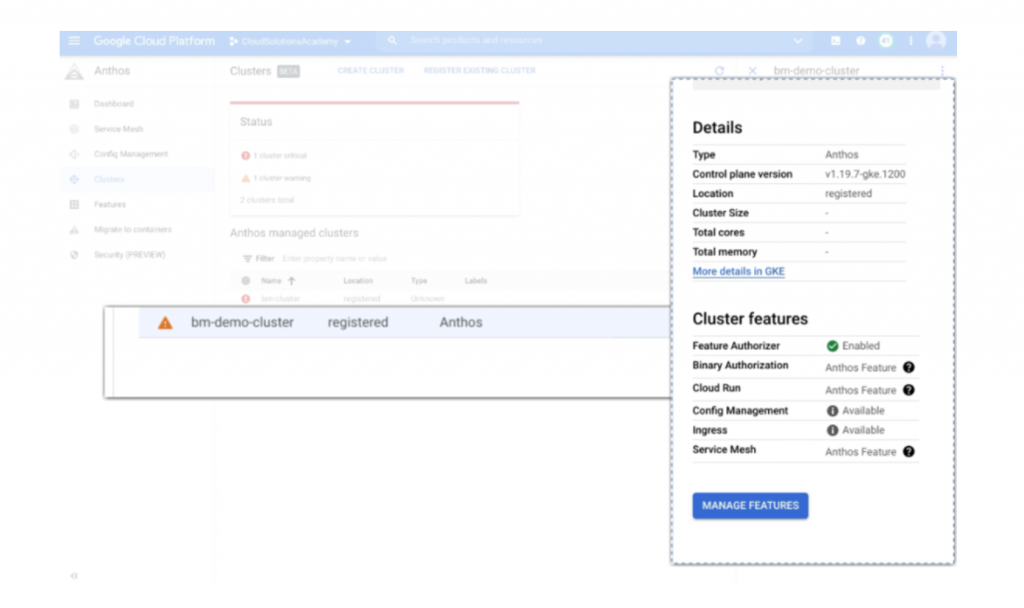
The “bm-demo-cluster “ has a warning sign (as shown above) as you need to login to the cluster. Click on “More detail in “GKE”. You would get a screen with Login option as shown below. 

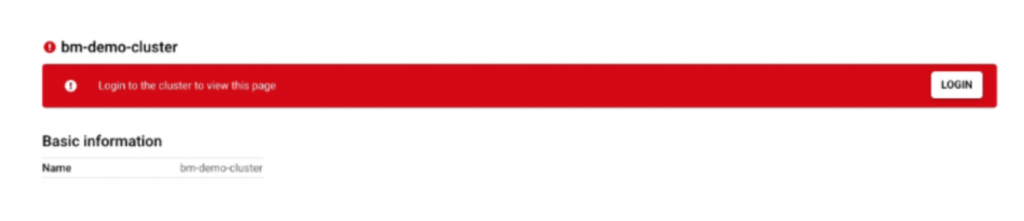
Click on Login in “bm-demo-cluster” and it shows 4 options to authenticate the cluster. We would use token to authenticate the cluster and view the cluster details.

To get the access token, we would first need to create a Kubernetes service account (KSA) with the appropriate roles to manage cluster details. We would create cloud-console-reader for view cluster access and cluster-admin role to allow any installation from Google Marketplace in future.

First export the kube configuration file.

export KUBECONFIG=~/bmctl-workspace/bm-demo-cluster/bm-demo-cluster-kubeconfig

Then execute the following commands in a sequence to create the KSA with appropriate roles

> KSA_NAME=ks-bm

> kubectl create serviceaccount ${KSA_NAME}

> kubectl create clusterrolebinding bm-cl-rb \

–clusterrole view –serviceaccount default:${KSA_NAME}

> kubectl create clusterrolebinding cc-reader-bd \

–clusterrole cloud-console-reader –serviceaccount default:${KSA_NAME}

> kubectl create clusterrolebinding kb-cl-rb \

–clusterrole cluster-admin –serviceaccount default:ks-bm

Once the roles are created, get the bearer token for the KSA, using the following command

> SECRET_NAME=$(kubectl get serviceaccount ks-bm -o jsonpath='{$.secrets[0].name}’)

> kubectl get secret ${SECRET_NAME} -o jsonpath='{$.data.token}’ | base64 –decode

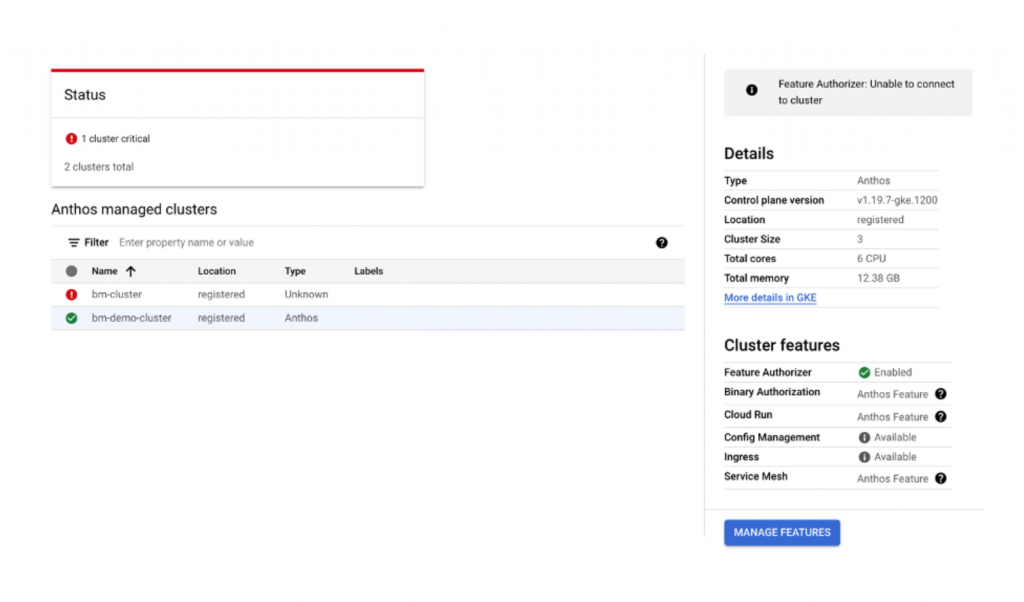
Copy the output from kubectl and paste it in token field on the cluster Login option.

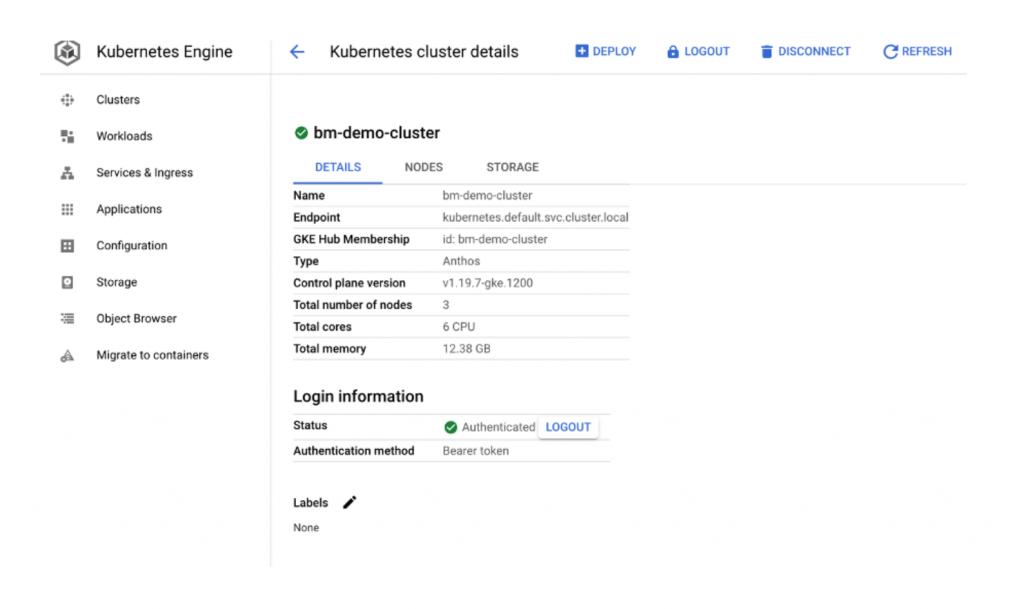
You should see the green icon next to the cluster and should be able to view the cluster details as shown in figure below.

Click on More details in GKE and you can view the bm-demo-cluster details as shown below.  

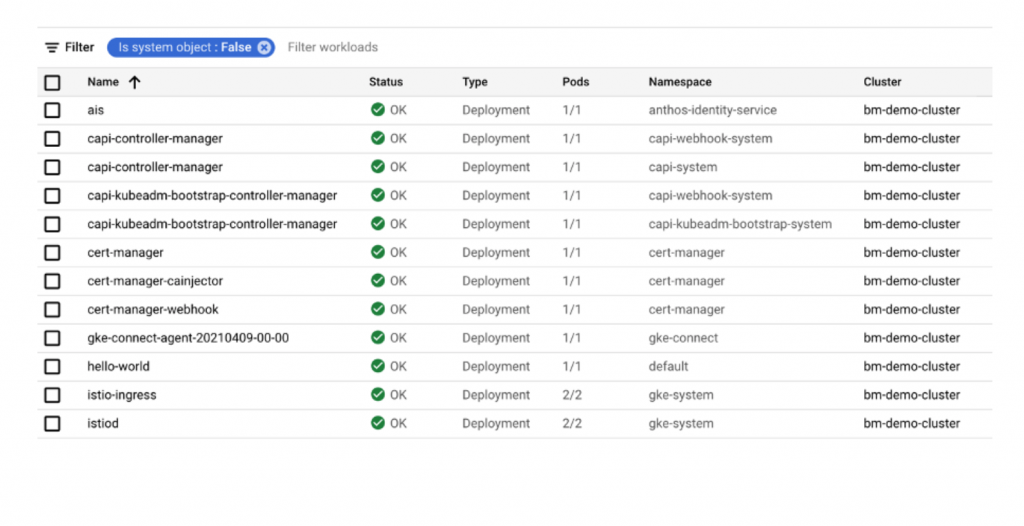
If you click on workloads, you can see all the workloads deployed on the cluster and status should be in green. 

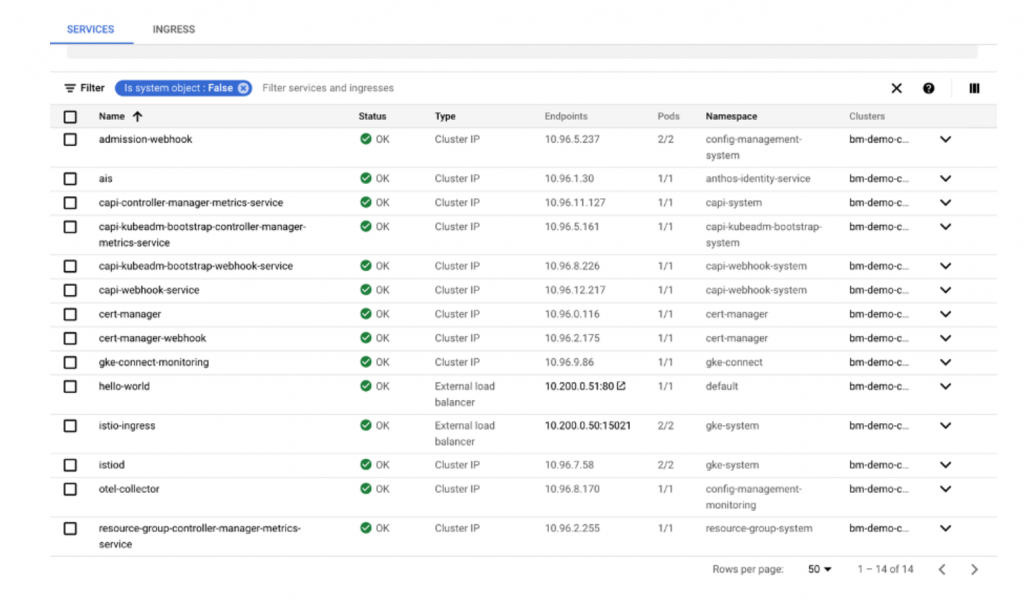
If you click on Service & Ingress, you can see all the services deployed on the cluster and status should be green. 

Next we would deploy a sample hello world application to the cluster.


Was this helpful?

1 Yes  No
Related Solutions
  • SUMMARY
  • Implement Multi cluster service mesh in a multiple VPC network
  • Implement Multi cluster service mesh in a single VPC network
  • Multi cluster service mesh (different VPC networks)
  • Multi cluster service mesh (single VPC network)
  • Anthos Service Mesh Topology
© 2021 Navveen Balani (https://navveenbalani.dev/) |. All rights reserved.